
If your goal is to travel for cheap and experience contact with nature, did you ever consider to buy a van and to convert it into a motorhome? WE DID! 😀 And here is a guide about how you can do it as well!
Things to consider before to start:
- Pick the right vehicle: where will you use it? If you’re looking for city tourism you may want to have something stealth, that you can use to sleep in the cities. If your going in poor countries, you may want something low profile. If you’re going in places with bad road conditions, you may want high clearance. In my opinion, I feel you should avoid a roulotte or something way too big: problems in driving are never a happy feeling, plus the bigger you are, the more vulnerable you’ll get (and the more expensive it will be for fuel efficiency and spare parts).
Check if what you want to buy is a common vehicle where you’ll be driving (cheaper parts at the wreckers). - Check your country regulations: can you drive it with your licence or do you need a special permit? How are the rules and specifics about registering it as a motorhome?
- Google the common issues about that specific model and people’s reviews; watch youtube videos about that model being converted.
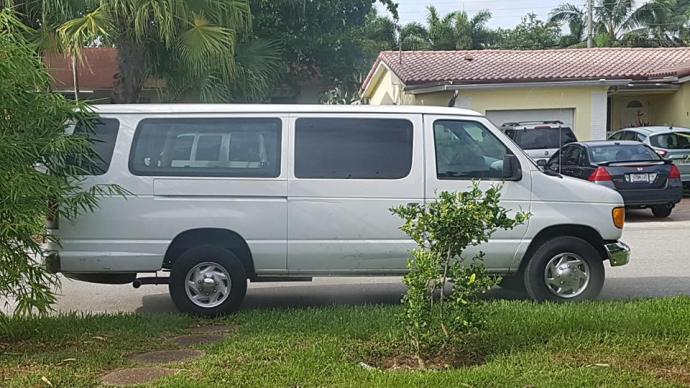
Now that you’re ready to start and you bought your vehicle, here are the things we did to convert our. It’s a 2004 Ford E-350 XLT passenger van, a real beauty!
- Decide your design. Make a drawing about where the bed will be, where the kitchen, etc. Measure everything and be sure it will fit before to place your online orders.
- While you wait for your delivery to arrive, you may want to go to a warehouse shop and pick your wood panels and isolation. Tubes, screws, check you have all the tools for the job. Buy sandpaper and roll films for the windshields.
- Let’s start with the hard job! Remove all inner plastics, back seats and their seatbelts, ceiling and moquette and clean that shit 😀 Remove with sandpaper all the rust (check also under the car and on the roof).
 Before, with the seats and plastics
 After, and finally clean!
 - Darken the windshields for more privacy. Good luck because this part sucks.
- Cut the isolation panels first. Then use their shape to cut the wood as well. Place all of them in position on the ground, check that everything fits perfectly. If you cut too much, you can fill some holes with some wood filler. Once you’re done, check below the van to see not to damage anything before putting the screws to the panels.


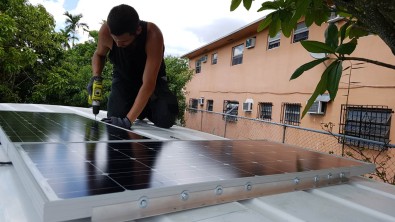 Put the solar panels on, we bought two Renogy 100W each monocrystalline, for 10amp each per hour (theorical, in practice 6-8 amp hour); we put metal angles on the panels edges (60 cm each) to make the panels stay in a upper position, then used bullons (3 cm) to fix them to the roof for extra safety, and then we put silicone on them to avoid water to get in.
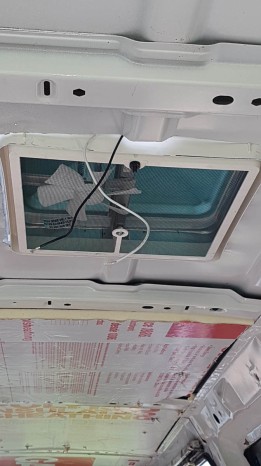 We cut the roof with a saw saw to create the hole for two rooftop windows with a fan, 40x40cm, we fitted the windows with clay (it’s for isolation) between the metal of the window and the metal of the roof, and then we secured them with screws. Siliconize everything, inside and outside. Before proceeding in putting the ceiling on, the best thing you can do is going on with the walls and hope that a big storm hits you: in this way you’ll know if the roof is dripping water and you’ll fix it before it gets seriously complicated, because once the wood panels are on, it will be hard to understand where to hole is.
- So, same procedure as the floor for the walls; put isolation panels first, if the spot is a complicated one and you don’t want to lose space (like for the back doors), put in the holes some wool-rock. Don’t you dare to use the glass one, if inhaled can lead to serious problems and it’s itchy as hell, you don’t want to have it around you while you leave in the van; bear in mind that wool-rock is similar, so be sure the material not to face the inside and to have the paper part of it facing the inside of the van (your living area). It’s not the best material to use because it can catch fire easily, so try to avoid it where possible and don’t put it anywhere close to a place that will involve fire (like a gas stove) or water (it will expand if wet). Place it also around the wheels.
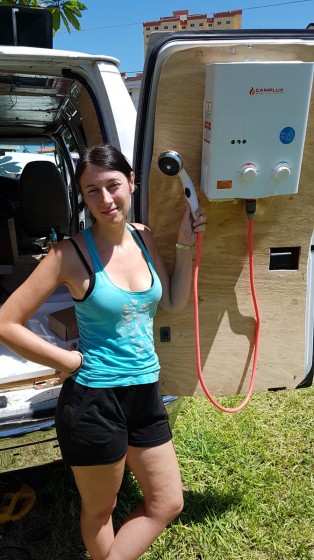 Now that you placed your isolation and wood panels on the back doors and walls, we can start putting some things in place. We started with the shower. We screwed the Camplux heating system to the door. Why? Technically it shall be for outside use only. We found convenient to have the possibility to take a shower both indoor and outdoor. First option is good when outside is freezing or you’re not in a suitable place. The second one is good for when you want to stand up while showering, when it’s hot outside and you have privacy, when you don’t want your humidity to get into the van (shower outside means less chances to for moist to develop and less chances for the wood to inflate) and when you are coming back from a muddy trekking. Also good in case you want to water a garden 😀 Please consider the right height for the shower, you’ll need to have space for both gas and water tubes and the door must open and close without hassle. Careful at the back windows when considering the position for the screws; to have them on metal is always better.
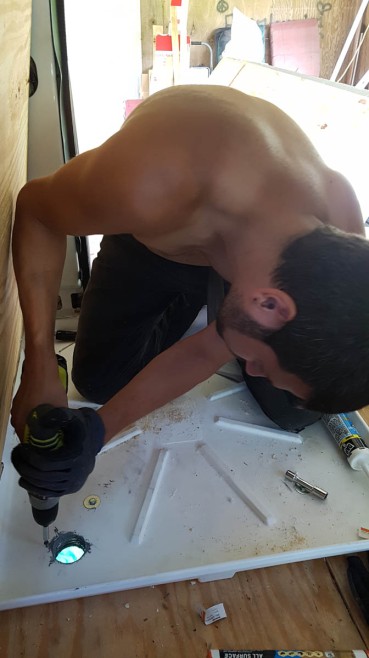 Another thing we decided to put on immediately is the shower plate. This is a fixed size so according to this we are going to know the dimension of the back storage that will be built beside it, and so the length of the bed. Create a hole underneath to let the gray water discharge. Personally we decided not to have a grey wastage tank, this is up to you and to the rules of your country; we take showers inside very rarely and in those occasions we simply do it on the grass. Careful at where you make your hole: your spare tire, your muffler, or something else may be underneath. Siliconize the edges and find a cap for your showers so insects can’t get inside.
- We have a chemical toilet. So this one is placed in the shower, and we put two hooks on the wall with a stripe so when we are travelling it doesn’t move around.
- If you have a sliding door on the side of your van you’re probably wondering how to put the wood on it. The trick is to use a thin wood, elastic and flexible. Remember to cut the shape leaving a hole for the handle, and for the locker. Slide the door many times and adjust accordingly.
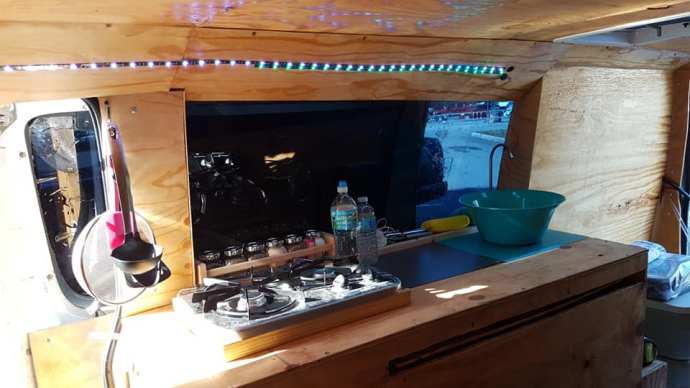
- Time to think about the kitchen. This is probably one of the toughest things to do. First, be sure you have everything before starting. Water tank (113 lt, 30 gallons is our), water filters (we got three so they are quite big), water pump, all the different tubes, gas bottle (20 lbs, 9 kg), gas stove. In case you want to do the kitchen like our, we made it with a sliding table so consider the height you need to have this, you want it to almost sit on your legs when you’re sit on the bed. Consider the space necessary for the lateral guides where the table will slide. Create a support for the water tank on the top of your wheel, in order to gain space. Then put everything in place to try to see if everything fits. Then, box it up with wood panels 😀
Use a sturdy wood, especially for the water tank support and for the table. Before screwing everything, create two little “doors”, one for the gas bottle, one for storage purpose. Remember to sand every edge, every surface, and to cut the door woods a 3 mm shorter to leave room for the hinges to work and open the doors without difficulty (and without scratching the floor). Put air filters, water pump, sink as well.
")
")
")
")
- Time for the worst: to put the ceiling on. Isolation panels are easy, problematic is to put heavy wooden panels without killing yourselves in the attempt. My suggestion is to use the same thin, elastic wood you used for the sliding door if you want to save yourself an hassle. Still, we opted for the same wood we used for the floor, as we had bullons and screws from the solar panels and windows to hide. So how did we do it? Cut them in advance, considering the size and position of the windows. Cut a panel, put it on, then measure again and THEN cut the following one. To fix them, use metal screws and fit them directly into the structural parts of the van (while the isolation panels will be in all the non-structural ones). To be sure to be firm, we used a crutch: you can decide its height and unless you hit it, it will never let you down 😀
")
")
")
- Now, time to build the wall that will divide your living area from the driving area. Yes you need this, otherwise you did all your isolation for nothing. Put your seats in the position that will be mostly used while travelling and consider to leave some space on the rear of your seats, at the bottom, for storage. For example, we put there our spare fuel tank, the tarp, the mosquito net, things you want to have handy in case of need but you don’t want in your living area.
")

")
Take a sturdy wood and make the structures. Then put isolation panels inside the structures, a thin wood panel on one side of it, and one on the other side. Remember to cut the panels for the door first and to leave, again, enough room for the hinges to do their job. Put a lock on both sides of the door so it won’t open while driving and you’ll have extra safety while sleeping. Fill the door side and the wall side (the one that goes against the sliding door) with wood filler.
- You’re also going to need more storage. To be precise, you need two of them: one for the electric system, van jacks, booster cables, engine oil / different fluids for the van, all the tools you may need to repair your car, all the stuff you need to make the services (if you make them yourselves like us) and a shelf for your almost empty backpacks; this storage doesn’t need continuous access, so we put it on the rear of the van, beside the shower, and only accessible from the outside; the second storage you’ll need is for daily things, and must be inside: we stored there the food, some pots, dishes etc.
Build a sturdy structure, as sturdier as you can, and use a good wood for the panels too.
")
")
")
")
")
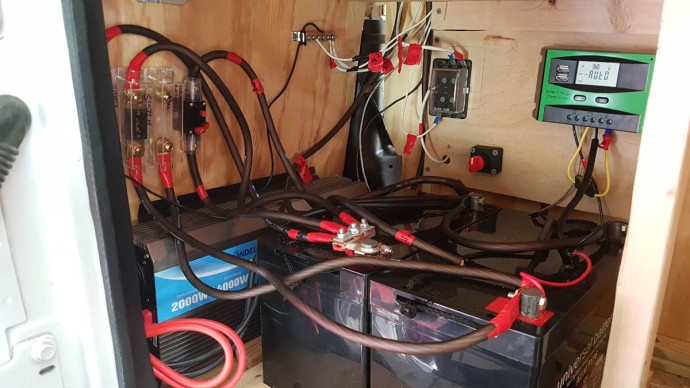
For the first storage, remember to close the door every time you insert a panel to check the size fits. Put heavy stuff at the bottom (ideally the electric system, we have two batteries that weight 25 kg each, plus the converter, the fuses, the cables, etc, and the car jacks (15 kg each), nothing inflammable, and if you think it will get hot in there, also a couple of fans to keep the batteries cool). Then we had two more layers for the tools, one is the height of a food can, a useful size that will fit lots of things. One last, fourth layer for the backpacks.
 About the inner food storage, this is been a total hassle and now I would do it differently. Our uses the same wall as the outside storage, but also the ceiling and the wall of the van (I wouldn’t make it touch this one anymore, it’s been such an hassle to make it open properly!). Remember also to put a stripe of led lights inside it, so you can see what’s inside for dinner 😀
 - Almost there! Did you buy your fridge? Good! Leave it overnight connected so you’ll be sure that your electric system can stand it. Once you know it’s okay, put two hooks against the wall and tight it with a stripe when you travel, so it won’t start dancing around scratching all the floor. We put a fire extinguisher on the wall, that sits on the fridge as it’s quite heavy.
- The final piece of furniture: the bed! It’s size shall now be certain: it all depends on the room you have left! Use a sturdy wood, cut all the pieces first, PAINT them first. Then screw everything. To make a 195 cm bed we used 26 bed slats, 13 per side, but everything depends on your wood size. Remember to leave 3 mm between each one so they will slide better. I suck at explaining this process but it’s quite easy, we made it in two hours. So I leave you the pictures to study how it’s made, but you can find so many types of sliding, foldable beds on google that it won’t be problematic. We made the structure outside, carried it inside the van with the legs ready, we put it on two empty buckets for support, and screwed the legs while inside the van. You’ll need at least three legs for the part that slides out, and I would say other three for the other. We didn’t put them at the extremities because we had the shower plate there, but use some common sense in where to place them and you’ll be good.
")
")
")
- Final, annoying retouches: cover every single part of metal you can see with a thin wood. Moisture on the wood is annoying, but rust on your metal is worse, especially if you can’t figure out it’s there until it’s too late.
- Fill the cracks with wood filler and when it’s dry paint like if there’s no tomorrow 😀 (well, no).
Use a paint that contains fixer as well so you don’t have to do double the job. We used satin colors so no problem, golden oak for furniture and walls (two medium vases) and a dark brown for the floor (so you won’t see too much when it’s dirty).")
")
- Put on the led stripes, the curtains structure (we used some metal wire and clothes pegs, super easy), the curtains, put somewhere a carbon dioxide alarm, the switches for the lights and one switch for the inverter (very useful to have it beside the bed), the electric plugs (we have two usb beside the bed, that tell us also the batteries voltage). Buy storage boxes that will fit the space underneath your bed for your clothes. Put a couple of hangers here and there, we have one also behind the passenger seat so if the jackets are wet they can hang out of the living area. Refill your gas bottle and water tank (once again, hooks and stripes), drive around, use the breaks and make quick turns, see if anything moves. You may want to put magnets on your storage doors if they open while driving.
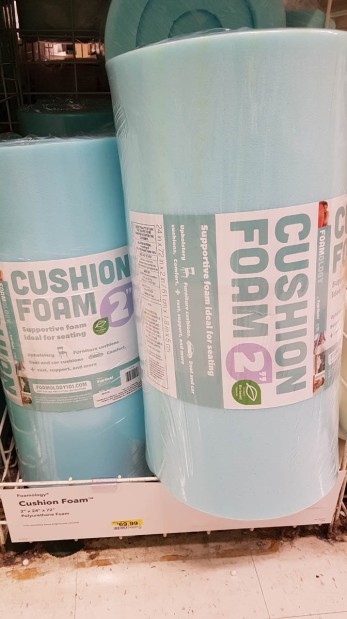 Buy a foam mattress and memory foam cover (ideally 4” plus 2”). Cut them the right size with a sharp knife. Glue the foam and the memory foam with a spray glue. Put two separate twin size fitted sheets for the mattress, and get a double flat one as blanket. Buy a duvet and have it handy, underneath the bed. Buy pots and food, tools to cook, possibly nothing that would brake (plastic cups, plates, etc). Remove your food from the original package if it takes lots of space and store everything in plastic sealable bags.
There shall be much more to say about this, but this article would become boring and long. This is just to give you an idea of the massive job that needs to be done, but obviously there’s much more than that. Most depends on your vehicle and on your laboring skills.
For more specific conversions, there are plenty of youtube videos that will explain better than I can do the electric system, the hydraulic one, the wood properties and potential problems. If you get stuck, simply go in some groups like “Self build campervan”, “self build campervan and real life”, “#vanlife” on facebook and use the search button. If it’s not been asked yet, you can do it.
We also made a live video showing the van in our facebook page Travelling Around The world: Close to eternity (direct link in homepage on the right side).


The total budget we spent was 4100$ usd for everything, including pots, mattresses, sheets, fire extinguisher etc. Like, EVERYTHING. But I know people who made it cheaper.
So guys, good luck and keep pursuing your dreams 😀


")
")
")
")
")
")
")
")

")
")
")
")
")
")
")
")
")
")
")


